I recently needed to removed the drive from a Western Digital My Book External USB/eSATA drive enclosure. Unfortunately, this wasn’t an obvious process and this excellent article by Scott Cramer didn’t apply to the newer version (1 TB drive) enclosure I have. So here you go, the steps required to disassemble a new-style Western Digital My Book drive enclosure.
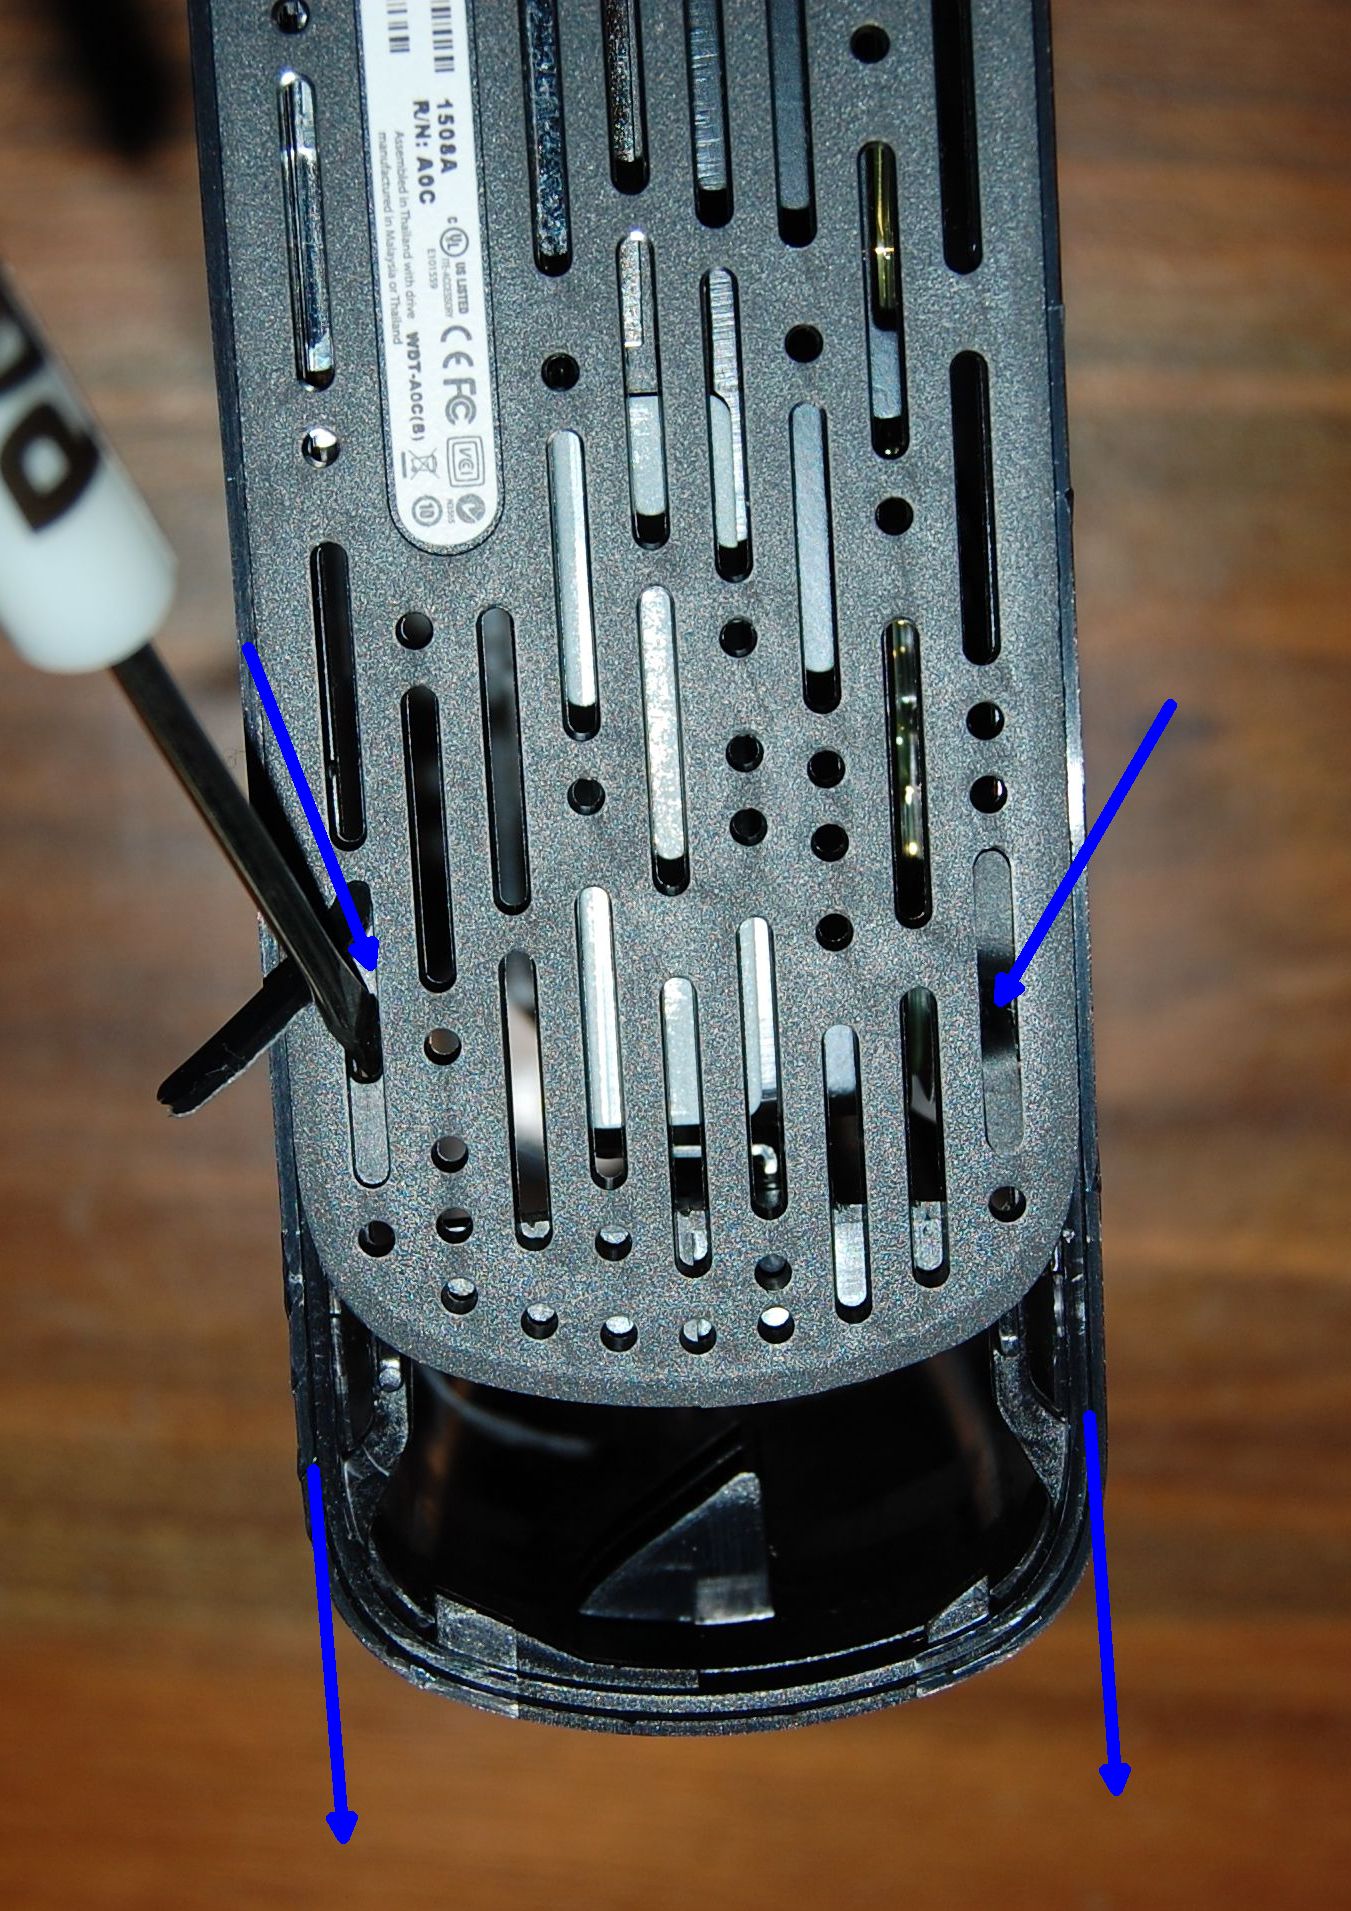
1. Locate the two rubber pads on the bottom of the enclosure near the front, curved surface. Remove these two pads. Depress the two tabs below using a small flat-head screwdriver.
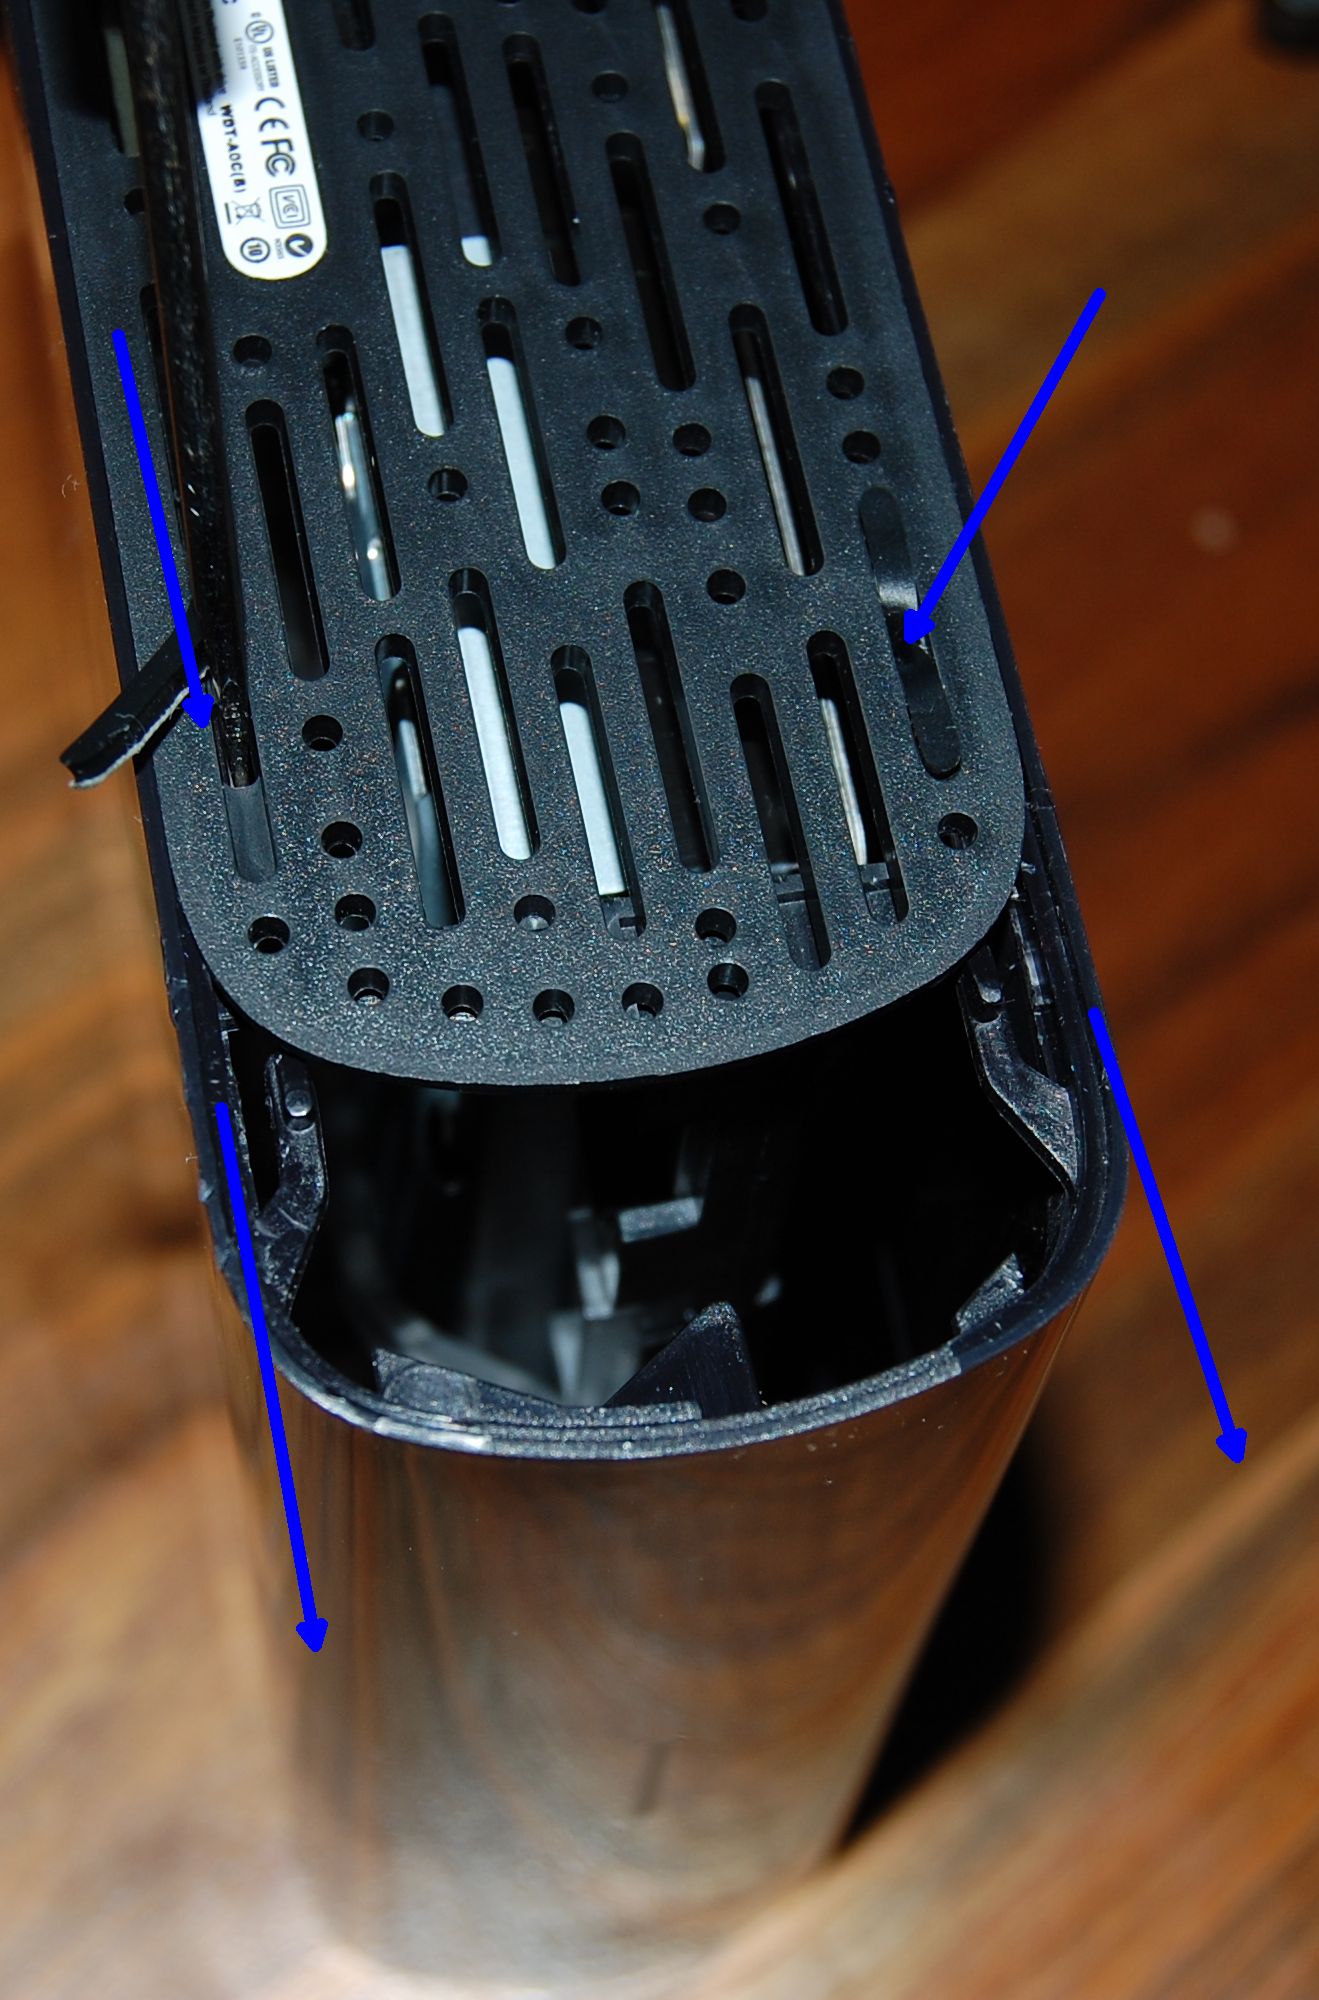
1a. With a couple of credit cards, pry the back edge of the casing apart and hold them open with the credit cards. There are some locking mechanisms there that need to be held apart. You can now slide the plastic casings apart. Note that it is easier to lift the round corners of the case and pop it out of the retainers than it is to slide it off due to the very tight fit of the sliding components.
2. Slide the clear plastic LED front panel conduit forward and remove.

3. Rotate the hard drive/carrier assembly sideways and then lift away from the case
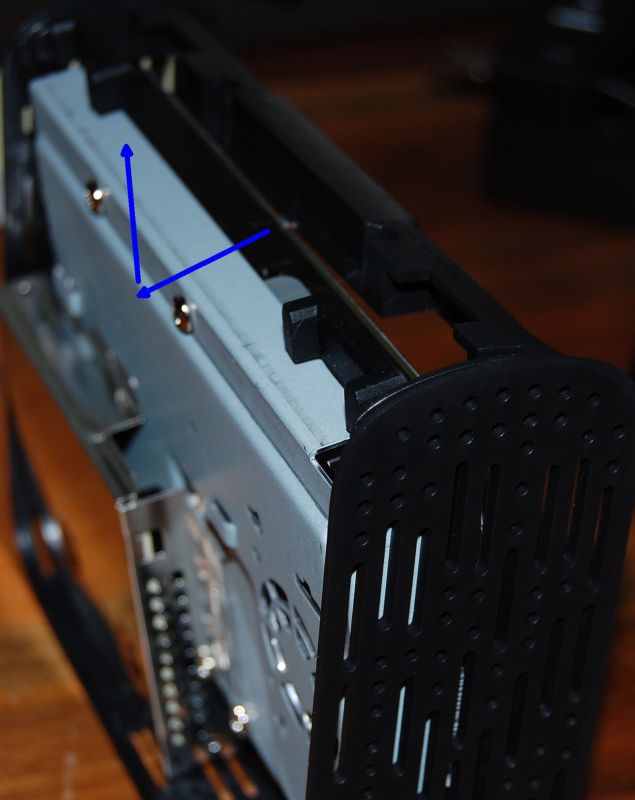
4. Remove the two screws holding the metal connector casing. Slide it upwards and remove it
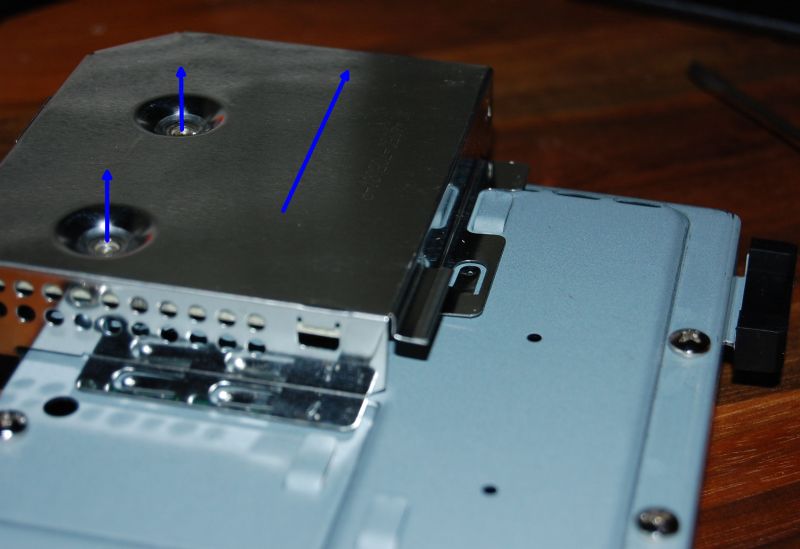
5. Slide the circuit board upwards (away from the drive), just like you did for the metal casing.
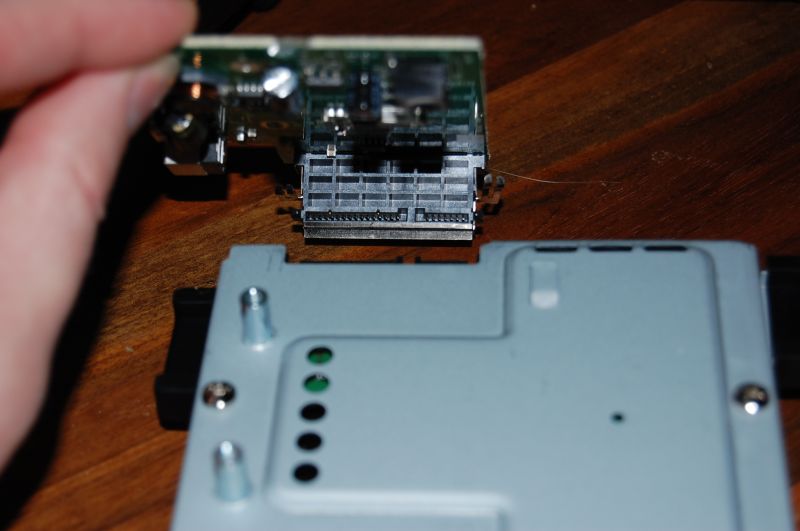
6. Remove the 4 screws holding the hard drive to the metal carrier. You’ll see that it is a standard 3.5″ desktop SATA drive.
You’re done!
Repeat the steps in reverse order to re-assemble the enclosure.
Getting Your Data Off of the Drive
In most cases, the circuit board inside the enclosure is the cause of the failure and the drive itself is fine. The drive is a standard 3.5-inch SATA drive and easiest way to get your data off is to use a SATA-to-USB adapter dock, such as this Thermaltake Dock at Amazon.com.

Thermaltake BlacX eSATA USB Docking Station
In many cases, all you need to do is connect the drive to a computer using a new dock and your data is immediately available. If it’s not, here are some suggestions:
- Test the drive using the Western Digital Data Lifeguard Diagnostic tool
- Use data recovery software:
- Use TestDisk to repair damaged partition tables.
- Purchase the Runtime.org GetDataBack data recovery software (free demo available)
- If you’re a Linux guru and have an empty spare drive on which to copy data, you can try using the SystemRescue bootable Linux CD and Antonio Diaz’s ddrescue command line program.
- Send the drive a professional data recovery specialist, such as DTI.
Video showing How to Opening the Case
Protect your data with offsite backups:
If you are looking for an even more robust backup solution, I highly recommend using an online backup service. If your hard drive fails, or in case of a catastrophic event (fire, theft), there is still a secure copy of your data. I’ve had great experiences with CrashPlan.com Offsite Backup, which allows you to backup files between your own computers for free, and gives unlimited unlimited offsite storage on their servers for $3.00/Month.
To Install a Different SATA Drive in the Original Western Digital Enclosure:
In many cases, the enclosure is probably what is failed. But if you’re sure it,s working, you can replace the original drive with a different drive. For example, I replaced the 1TB drive with a 200GB drive. I didn’t have to do anything special, I just put the new drive in the enclosure, plugged everything in, and it worked.
However, a few people have had with the enclosure recognizing the new drive. If you do, try this:
(thanks Fisslefink) The onboard chipset memory of the MyBook Studio needed to be reset. When you remove the metal shielding, you see the circuit board and all of the different components. One of them is two metal prongs, an empty jumper (J6, may be different on your board), sticking out of the circuit board, near the DC power input. By shorting those jumper pins together with a metal screwdriver for 2 seconds (with the drive OFF and the power cord REMOVED!), the board will reset so it can recognize the new drive.
For what it’s worth, if your drive supports slower SATA operation, you can use a traditional jumper shunt (those darn little black things that get lost all the time!) to connect the jumpers at OPT1 on the 250GB drive itself. This switches it from the faster “SATA 2” 3.0GB/s transfer rate to the slower 1.5GB/s rate, with which the enclosure chipset may be more compatible.
there is an information in the usb but now it need to be formatted so I think the usb is damaged and to access that information or fix the usb if possible.
Hi! I own a very old Western Digital 640 Gb SATA/8MB cache WD6400AAVS -00G9B1 – WD Caviar Green. unintentionally I used the wrong power adapter and I believe I burnt the PCB. Before this mishap the external HD was working perfectly fine. I am trying to buy a HD docking station to retrieve the info. I purchased the iDsonix super speed USB 3.0 (iDD-U3102) and it wouldn’t recognize the external drive. Would you please recommend a Hard Drive docking station compatible with the specific external HD mentioned above. Thank you in advance for any help you can give. Be well 🙂
Hi. Just followed your instructions on this and I’ve got my “dead” WD 1TB running in a Next Star Hard Drive Dock. THANK YOU for your guidance on this.
on several of the larger NAS or even external desktop drives I have been unable to get any system to recognize the drives once removed from the NAS or USB controller board. These are all larger 3 or 4 TB drives. I had read somewhere that the drives are formatted such as they can only be “seen” when connected to the correct controller. For my correct needs, i would much rather just mount them inside the system case and they do have the standard SATA connectors. Any idea what I am doing wrong?
questorfla: You’ll need the exact same controller to be able recover the data from the drive. It’s encrypted by the controller.
Carlton, but if encryption were the issue, I should be able to at least see the drive and reformat it. It isn’t detected at all. This is an 8T Mybook drive.
Western Digital has changed the hardware over the years. Some drives have proprietary connections on them (usually just switched pins on the connector, but could be more) that prevent the drive from being accessed using a standard SATA connection. (They did this to prevent the drives from being removed from external enclosures and used as internal drives – because the internal drives are usually sold at a higher price than external drives.)
My book essential extra drive problems with power button
ACS Data Recovery has been a leading provider of hard drive and RAID data recovery services since 2003.
Thank you! Very helpful, I had to open de WD MyBook 500gb.
Where do I register to watch the video?
Video link updated
Hi Carlton,
I have stumbled upon this guide and first of all thanks for taking time to describe the issues and fixes. I have a MyBook Essential 2TB drive – hdd seams fine, just not mounting. I understand this is a problem with the encryption, however my board (external case – not PCB) looks like it is burned and I am unable to recover it. Do you think that if I buy another MyBook Essential drive with different parameters (ie. 1TB instead of 2TB) – take it apart and use the USB board? Would the encryption key be stored on my drive and work with other USB boards?
So far I have used a third party to replace my PCB board (and transfer bios) but it looks like this might have not been the issue. So now I am looking at this burned USB/Power/Board knowing I can’t clean it as it must have effected a lot of components or the whole circuit.
Any further explanation or information on this that you might have and could help me, would be grately appriciated. I am unable to afford proper data recovery as it costs too much for me to handle. Data on my drive is uber important for me as it includes photos/videos of my newborn child and it would be a great shame to loose it all (+last 10 years of digital photos and other data).
Kind Regards,
Mike, PL Gdansk
Mike, your best bet is to get a working version of the exact same model, from ebay or elsewhere, and put your drive in that enclosure. Some WD will be the same as yours, but others will be different. I don’t know the details of each model. Your other option is to send the drive to a data recovery service. Good luck!
Hi
I would like change inner disk in my WD My Book Studio WDBC3G0020HAL.
When I opened my WDBC3G0020HAL, I discovered WD20EARX Green’s series.
Can I upgrade inner disk with WD Green WD40EZRX or WD50EZRX, WD60EZRX?
Kind Regards,
Dmitriy, Ukraine, Dnipro
You might be able to do that upgrade. It’s hard to say. It’s hit or miss with WD compatibility. You can give it a try, but you’re probably better off just getting a new external enclosure and drive. Or find a third-party enclosure and add whatever drive you want.
Hi, thanks for your guide. I’m looking to swap my My Book Studio drive with Seagate, but seems like i can’t find the prongs and jumpers mentioned above.. i can see others J1-J17 but not J6
Not sure if you (or Fisslefink) have this documented, a picture references maybe?
My board is 4060-705083-003.REV. A
Appreciate any advices.
Cheers!
That newer version may not have a jumper. I didn’t find that it was essential to use it in older versions.
Hi, My Book Studio (White Case with display). Changed damaged WD Green 1 Tb with WD Red 2 Tb, all worked fine!!!! Need format before 🙂
No neede reset or anything, only put new drive – format.
Hi, I have the WD My Book 4TB drive and I did exactly what you said. But after I placed it in a new dock and plug it into my mac, it prompts me to reformat the disk. What can I do to get my data out from this point? Please help! Thank you.
Did you purchase the exact same model number Western Digital external drive, remove the new drive, and install the old drive? That is your only option to overcome the encryption chip. The chip has to be identical between the external enclosures.
Great instructions. Thank you.
Sorry to say but in July 2020 this information is no longer correct
The Disk Management Tool no longer recognizes a WD Elements drive removed from it’s enclosure
Hi, I have a My Book for Mac 3TB which works fine until i had to remove the drive and use it in another project and then tried to put it back in its enclosure. WD Tools reports a 3TB drive however it only formats as a 2TB drive using WD tools or OSX Disk Utils. Have I missed a step in preparing the drive to be reinserted? e.g. wrong partition type or something? Any help much appreciated
You should try formatting it with a different partition type and/or file system. Try GUID if you haven’t.
Switching to GUID was the first thing I tried. I even wiped the drive and inserted it and used WD Tools to get the case to format the drive but still didn’t work. It’s a bit odd.
I removed the drive from casing but there are 4 bolts sticking out and they have no screw indents to remove them NOW what I am considering sawing two of them off so i can slide it into a reader. Any suggestions
I’ve an old Wd My Book Essential 2TB USB2 HDD. The original WD Green 2Tb has broken sector and fails. I bought a new WD RED (NAS) 6TB disk. The Windows detect a disk with 6TB. But the disk is Locked. Never I use the Password Lock in my Mybook if I change the disk the old disk is not Locked. When I try to access from disk management appear as disk with unallocated and is not possible to inicialized because is locked and disk manager or Virtual Disk said Access Denied.
The problem could be that the enclosure only supports 2TB hard drives or smaller. I highly recommend scrapping the old WD enclosure and using something like this instead: https://amzn.to/3leBb3e
Thanks! The strange is the disk is full viewed only locked.